Setting up autopay for your PC Mastercard ensures your payments are made on time, helping you avoid late fees and interest charges.
Here’s a simple, step-by-step guide to enable autopay using official PC Financial procedures.
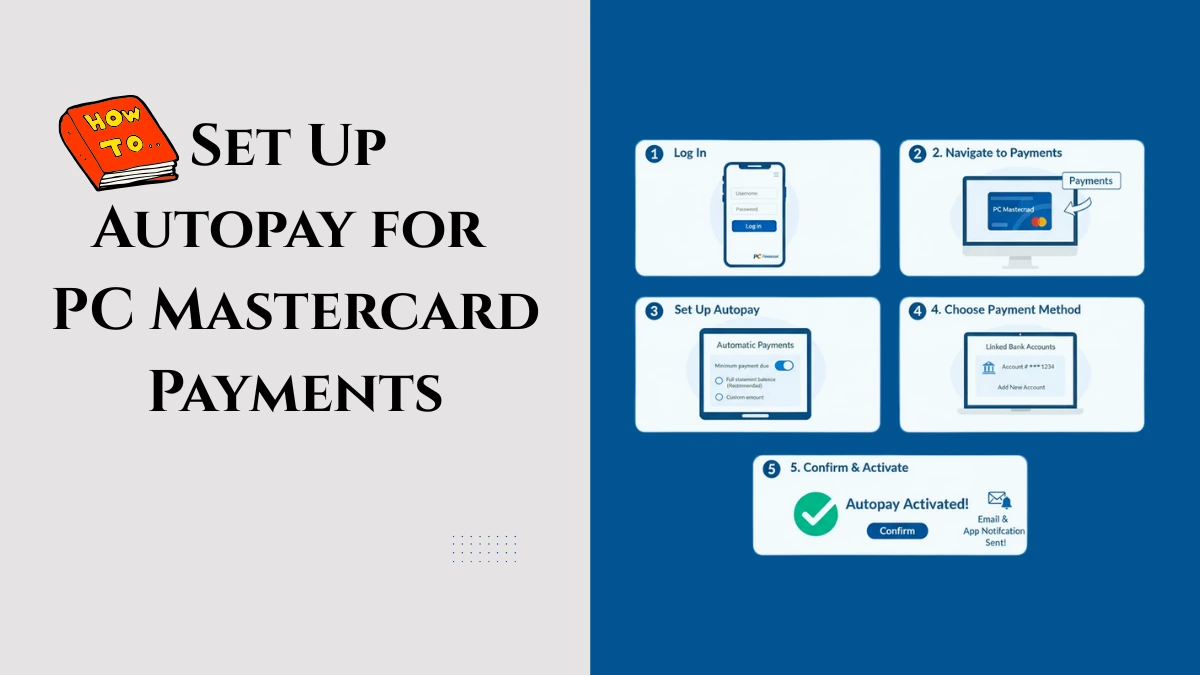
How to Set Up Autopay for PC Mastercard Payments
Step 1: Log In to Your PC Financial Account
- Visit the PC Financial website or open the PC Financial mobile app.
- Enter your login credentials to access your online account.
Step 2: Navigate to the Payments Section
- In your account dashboard, select your PC Mastercard account.
- Find and click on the Payments or Manage Payments tab.
Step 3: Set Up Autopay
- Choose Autopay or Automatic Payments option.
- Select the payment amount:
- Minimum payment due,
- Full statement balance, or
- Custom amount.
Step 4: Choose Your Payment Method
- Select your linked bank account or add a new one.
- Verify the account details and confirm authorization for autopay withdrawals.
Step 5: Confirm and Activate
- Review all autopay settings and terms.
- Confirm to activate autopay with PC Financial.
- You will receive confirmation via email or app notification.
Additional Tips
- Autopay starts for the next payment cycle, so make sure to set it up before your next due date.
- You can change or cancel autopay anytime within your account settings.
- Keep an eye on your bank balance to avoid overdraft fees.